I thought I’d write an article about this as I’ve had a few people asking questions, hopefully some of you have heard of Trello but if now it’s literally a tool to help you organise and work collaboratively. The free version includes nearly everything, the paid part only adds on a few features that aren’t that valuable. You can get started / sign up here.
It’s worth bearing in mind this doesn’t work for everyone, some people are naturally organised, some people genuinely work better in chaos but for those of you in-between who could do with a helping hand this might be for you.
They have a help page that can take you through some of the basics like basics, creating a board and features you can take a look at here, they even have videos if you’re not sure. What I did want to talk about however is how YOU might find it useful, how to setup a personal board to manage your work and some of the features that can help with stuff coming in.
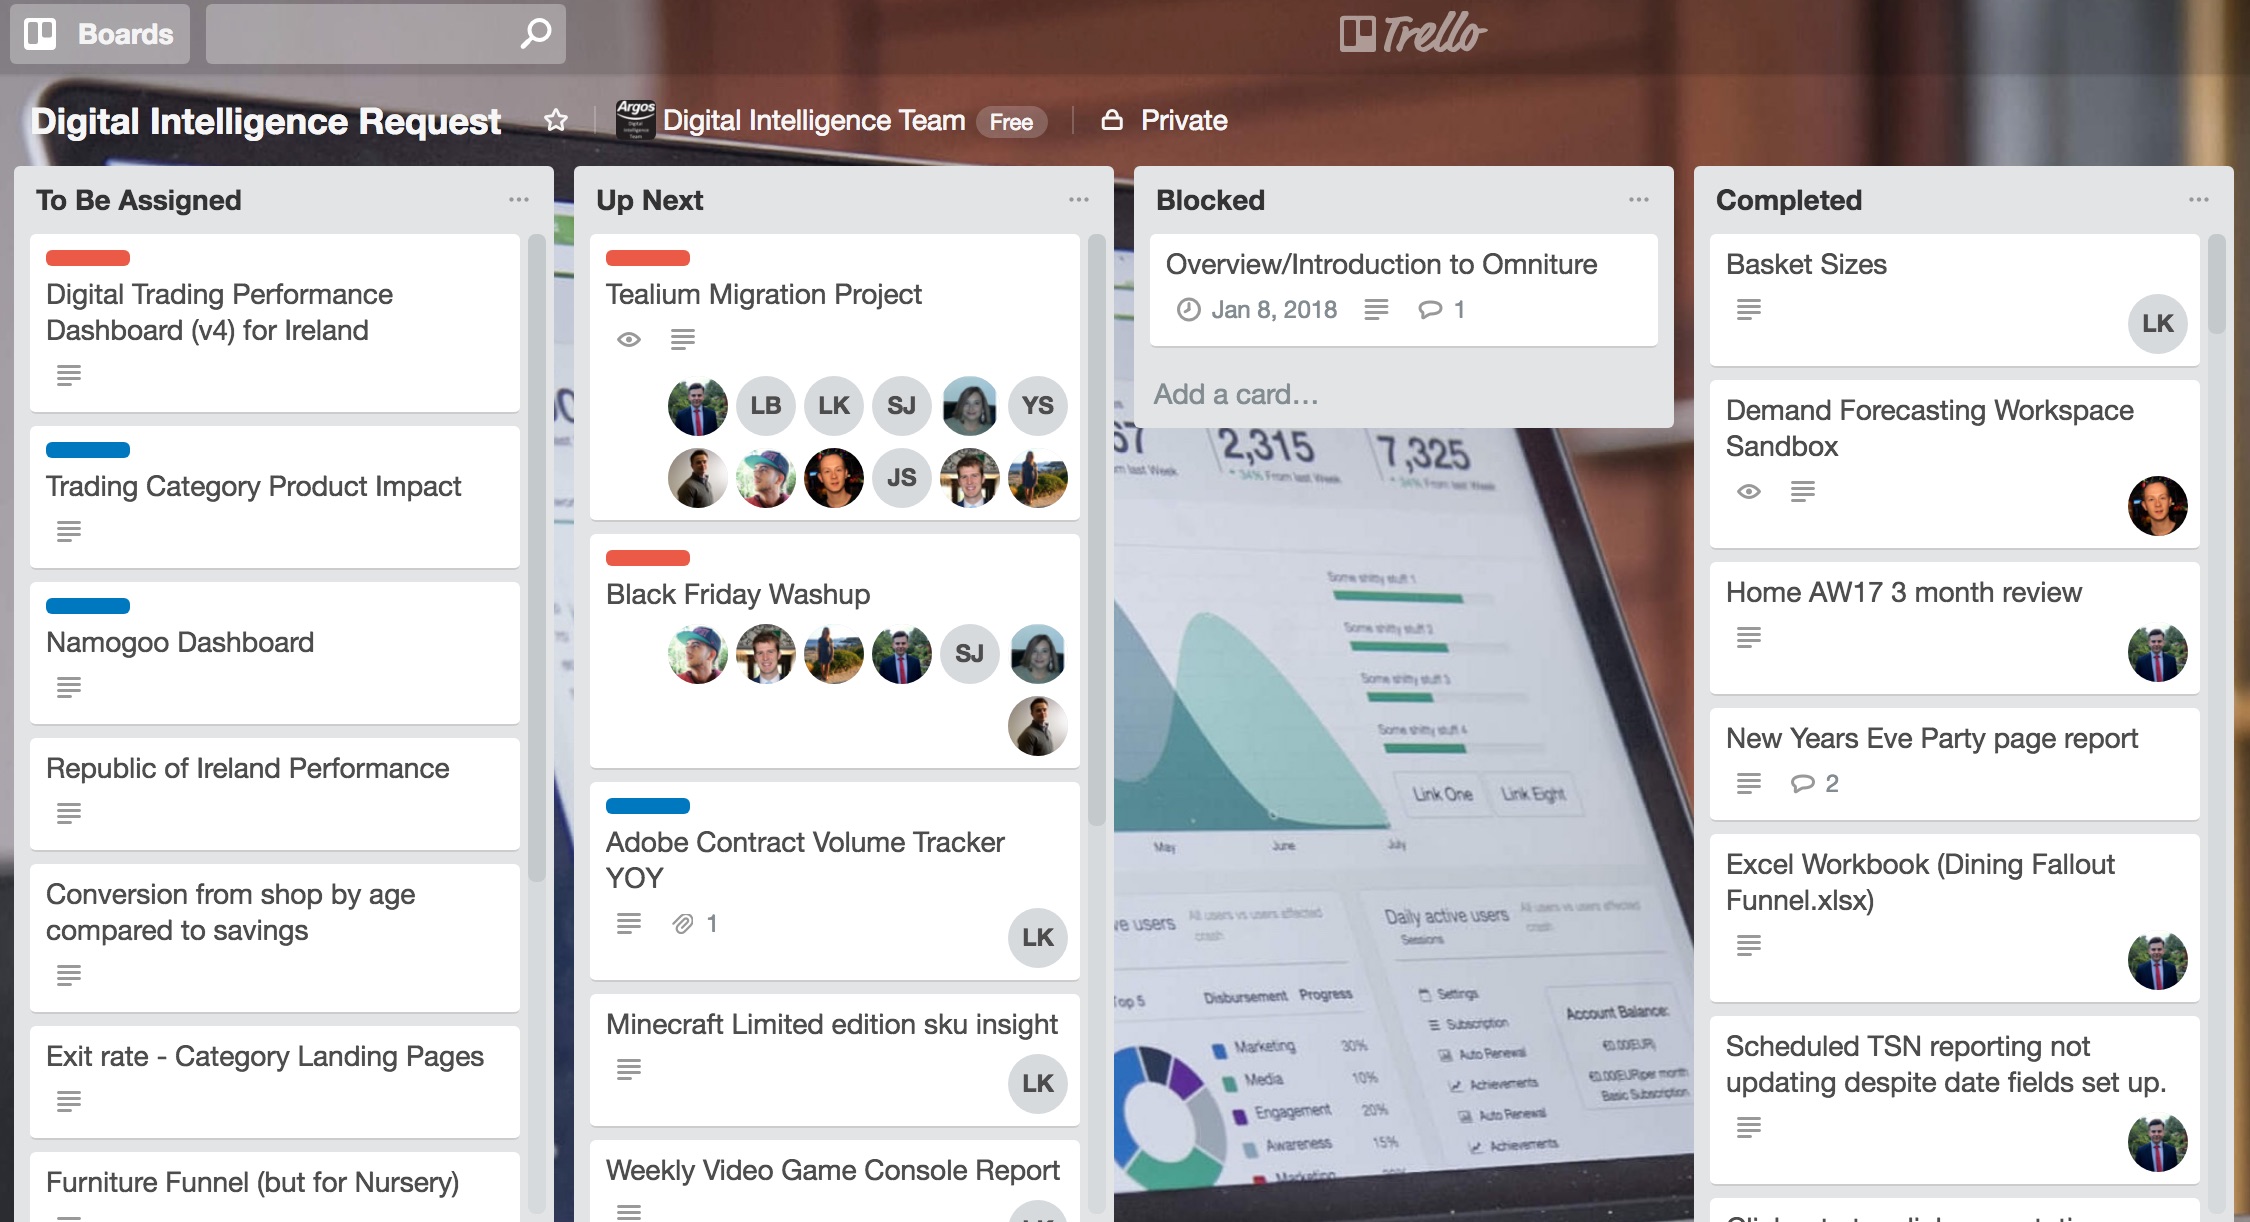
Typically I’d setup a board like below and how our team works together on requests:

- TBA (To Be Actioned) – Now the idea is all of the requests you get via email, Skype, text, WhatsApp, Slack, phone, carrier pigeon you dump straight in “TBA”. That’s where your ‘backlog’ is. This is a similar approach to how product development or agile works. I’ll show you another trick with this a bit further down.
- Up Next / In Progress – Next you have your “Up Next / In Progress”, if you’ve got a lot of stuff you might want to split this out so you know what you’ve decided you’re going to work on next and what you’re currently working on. That being said I typically find it’s not necessary and I can keep the things I’m currently working on or just about to start in this list.
- Blocked – now this is an important one, if you’re waiting for a response, can’t do something because it’s not possible at the moment, etc, put it in here. This lets you know how many items you’re working on or want to work on but can’t due to external factors. This keeps your “Up Next / In Progress” list clear of junk that you can’t do anything about. You’d typically check this on a regular basis to make sure there’s nothing that’s changed.
- Completed – hopefully doesn’t require much in the way of explanation but this is where you’ve put stuff once it’s done. I’d try not to archive or delete stuff from here as it’s useful as a log that you can go back to.
Typically this is how our team operate and you can see what it looks like for us below but this can be done for a team or for an individual depending on how you work best.
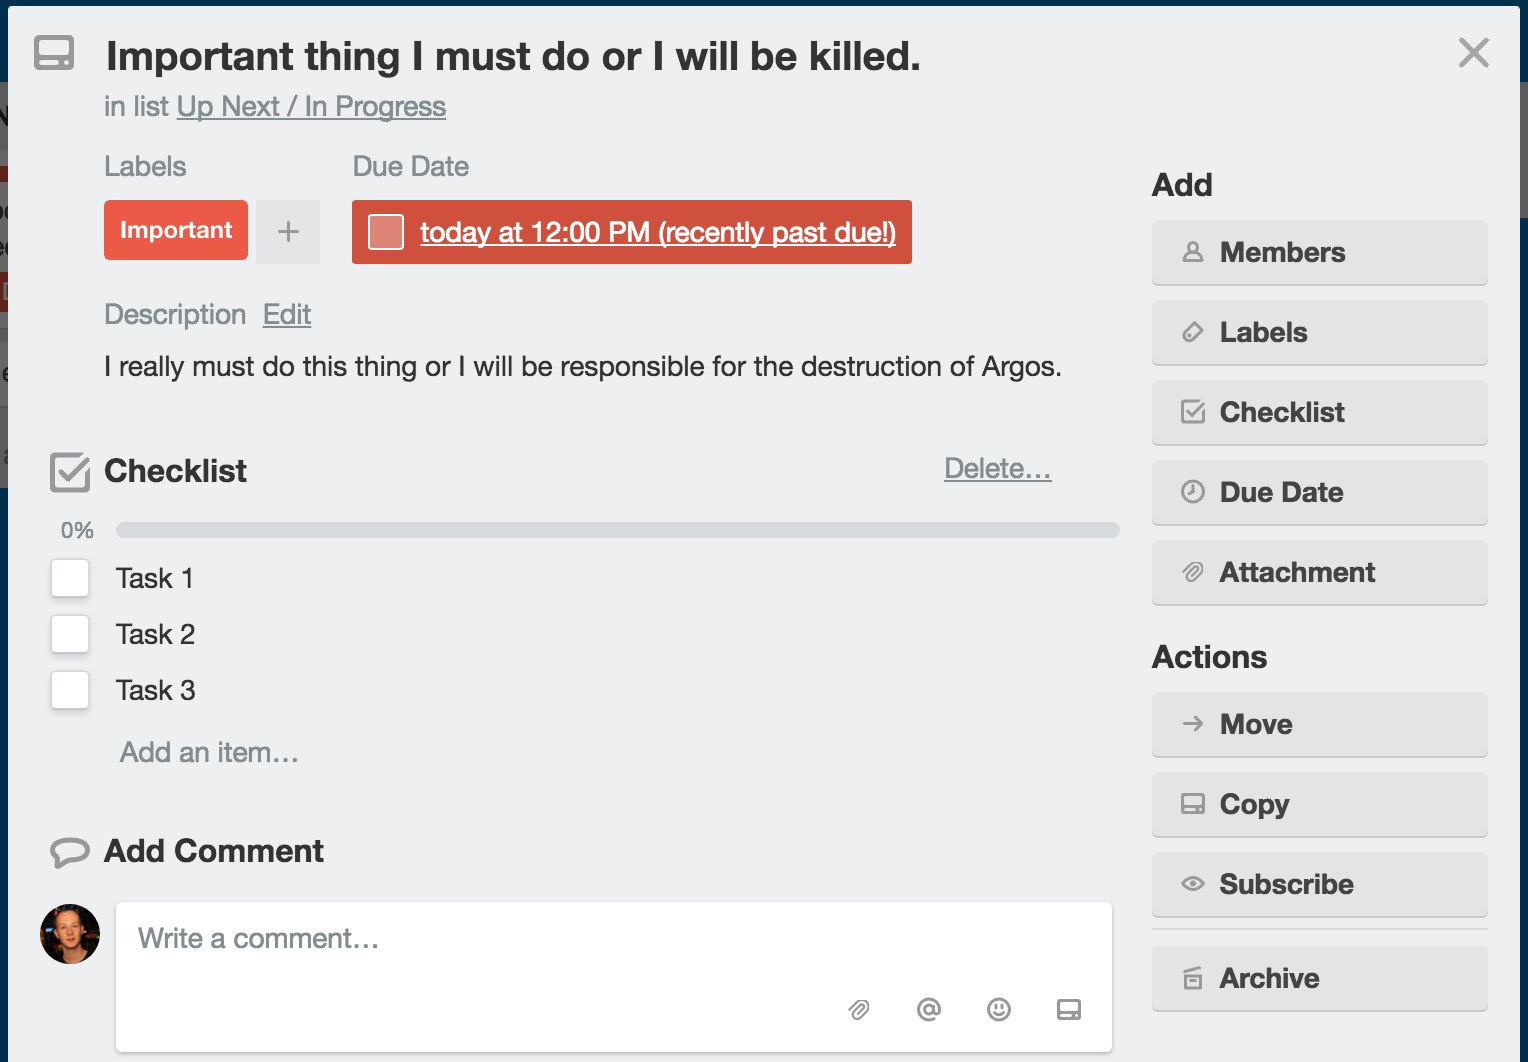
Card Setup
There is a whole host of options within the cards themselves, you can:
- set your labels (which you can also do from the board).
- add a due date which will highlight if your over due.
- if you’ve got others in the team signed up you can add them to the card if they’re involved.
- create a checklist or multiple checklists of individual tasks.
- attach files from multiple places including One Drive so if you work from One Drive your file will always be up to date.
- write a description including bullets, numbered lists, links, headings, etc (click to start writing and press the formatting button if you’re not sure).
- add comments either for your own information or get other people to comment!
- you can also move or copy to other boards, or archive (doesn’t delete just hides the card).
- subscribe, if it’s somebody else’s board you can subscribe to get notified of any updates.
- you can also see the history of the card, any changes, updates, comments.
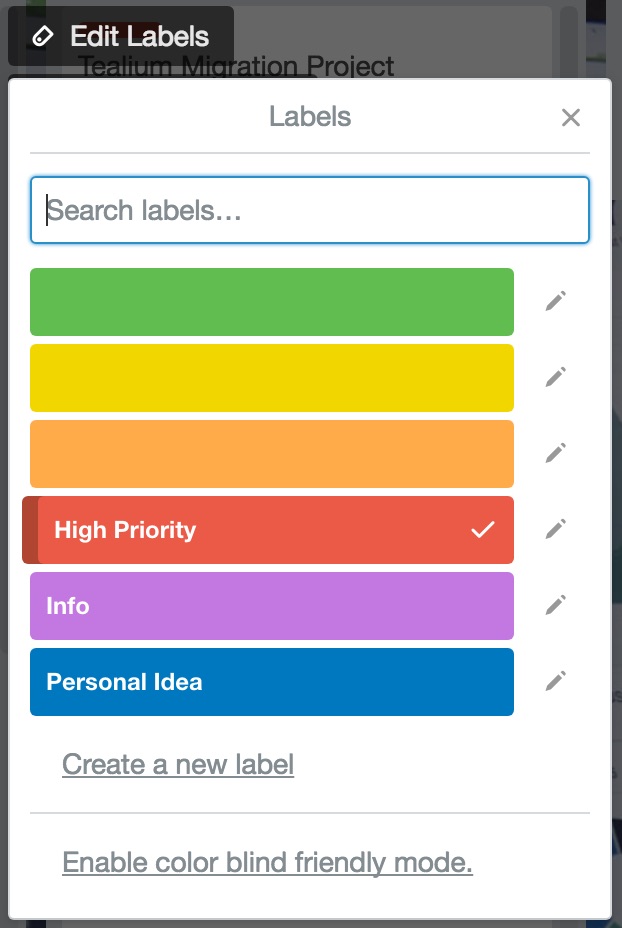
Labels
You can use labels to help colour code things and you can also name those labels and create new ones, you might for example want “High Priority” because lets face it even at the top of the list you sometimes need that extra RED to stand out. You might want a colour for your own ideas of things that you want to do or ones that are just for information but you want to have in Trello so they’re easy to find.
Main Menu
There are a few options of note in here, if you hit the “Show Menu” icon on the top right you’ll see these:
- Change Background – okay maybe not that important but if you hit “Change Background” you can select from a ton of photos to make your board a little bit more personalised.
- Filter Cards – if you’re working with other people on a board or have a lot on there you might find it a bit overwhelming with all the cards, if you hit “Show Menu” and what’s even better is you can bookmark these if you want to have a team board but filtered to “me only”.
- Email-to-board – this is a really useful option, if you don’t want to have to manually copy and paste requests or write them up you can just email them directly to the board! You’ll find this option under “More” but it will give you a funky email address you can send stuff too, save this in your contacts as something easy to remember and whenever you want to add an item just forward it on.
- Activity – here’s where you can see overall activity for the board if you’re wanting to see what’s changed recently and don’t want to go in to each card.
Tips and Tricks
- If you want to make it possible for people to fill in a form to request some work you can either use something like TypeForm or Survey Monkey to create a form / survey and direct the responses to the Trello “Email-to-board” email address. That way you can get people to push stuff directly to your board without having to do anything!
- Make sure you save your work to One Drive rather than your local computer, aside from the fact it means you can access it from home and share it, you can also link it to a card and the file the card refers too will always be up to date, no more uploading version 1.1, 1.1.1, 1.1.1.1, you get the idea…